Originally published on Medium in January 2023.
Modern JavaScript frameworks are pretty awesome these days. It is typically a simple, seamless experience to maintain some form of state — a source of data or truth — within a component. That local state can also be manipulated and, perhaps most importantly for the purposes of a web application, rendered on screen for the user, either as is used or in a more dynamic fashion.
In a Vue.js application, local state can be maintained either in the data object if utilizing the Options API, or through refs and reactives if opting for the Composition API instead.
In a React application, you could utilize the useState hook to create local state within any component.
But what if you need to share state across multiple components? For example, you could be developing a shopping website with many different pages for different product categories. You may have a “cart” component that needs access to the cart state, but your product category pages may need access to the state as well. What about a pop-up component to let you know you have X items waiting in your cart?
Luckily for us, there’s many different global state management readily available. Today, we’re going to talk about the latest and greatest from the Vue.js team — Pinia.
Why use a global state management solution, anyway?
If you’re thinking, well why don’t I just maintain my state in the highest-level parent component and pass it down through props as necessary, who can blame you? As with just about all things programming, there’s more than one method to achieve the same result. You just need to consider the trade-offs of each.
In a larger scale app using a components and props-based framework (Vue, React, Angular), the major trade-off we need to consider is prop drilling.
Kent Dobbs, an excellent JavaScript and web development teacher, has an awesome and succinct article about prop drilling:
While the article specifically exemplifies the topic through React, the concepts are the same for a Vue.js application.
In a nutshell, as your application scales, it becomes cumbersome to pass data around the application through props. If you’re accepting props in a component just for them to be passed to another component, you’re most likely in need of a better state management solution.
Why Pinia and not Vuex?

If you’re reading this article, you’re most likely already familiar with Vue.js and the concept of state management. You may also already be using Vuex in your Vue applications. If so, you’re almost certainly wondering why you should now use Pinia instead of Vuex?
First and foremost, Pinia is the official state management solution promoted by the Vue team. It was developed by a Vue core team member, and if you visit the Vuex documentation linked above, you’ll see right away they recommend using Pinia.
I’ve found that when working with a framework, any tools promoted as part of that framework’s ecosystem should be utilized in your application. These libraries were specifically designed to work together!
Other advantages to Pinia:
- Much simpler API. One of the cumbersome aspects of Vuex is having to call a mutation within an action to modify the state. Mutations are non-existent in Pinia, and your state can be modified directly within the function scope of an action.
- Along with ditching mutations, Pinia actions no longer need to receive arguments like “context” in order to commit a mutation. Less verbose!
- Vue components only need to consume the data stores required in that component. With Vuex, all of the components within your application have access to $store, and while that’s convenient for calling actions or retrieving state from multiple stores, each component is consuming the entire store. In Pinia, only the store(s) you need access to will be imported to a given component.
This article at Vue Mastery lays out these same points very well:
Getting started with Pinia in a Vue application
Alright, time to get started with Pinia!
Disclaimer
This article assumes you’re familiar with the basics of Vue 3, including templating syntax, directives such as v-for and v-if, props, components, and the Composition API. Familiarity with the Options API is suggested as well.
Spin up an application
We’re going to scaffold a project with Vite.
If you’re unfamiliar with Vite and haven’t used it yet, stop what you’re doing and read their documentation. Vite is a Webpack equivalent that solves a lot of drawbacks from Webpack, and is quickly becoming a very popular tool among front-end developers.
Key for me, though, is the fact that it was created by Evan You, the creator of Vue.js, and other members of the Vue core team. As I mentioned earlier, ecosystem!
To initialize a Vite project, run the following from your command line:
npm create vite@latestFollow the prompts and make sure to select Vue as your framework when asked.
For variant, we’ll be working with JavaScript.
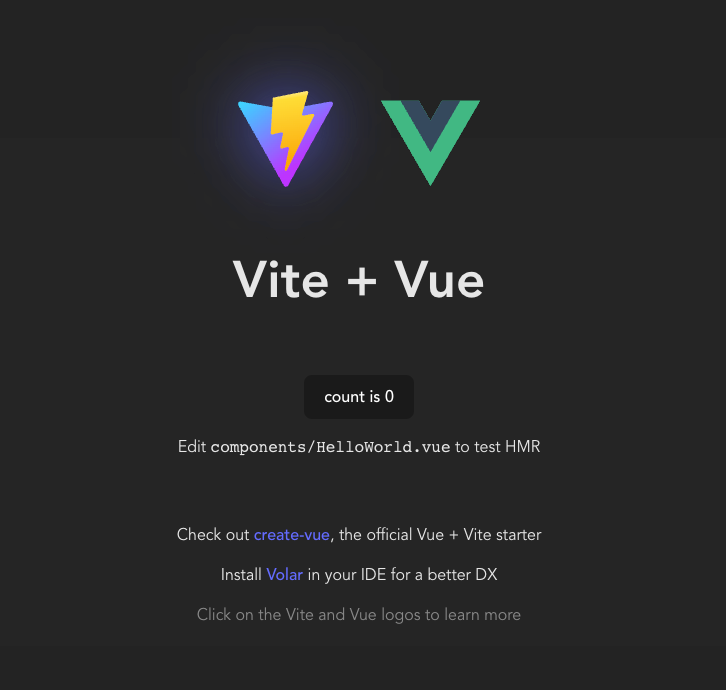
Open up your project in your text editor, execute npm install, then execute npm run dev. A dev server will be spun up and once you visit it in your browser, you’ll see some nicely scaffolded project:
Install Pinia
Next, we’ll install Pinia by running npm install pinia in our project’s root directory. Once installation is complete, we need to update our main.js file in order to pass a Pinia instance to the app as a plugin.
With our Vite scaffolded project, our main.js file initially looks like this:
import { createApp } from 'vue';
import './style.css';
import App from './App.vue';

createApp(App).mount('#app');
We’ll update it like so:
import { createApp } from 'vue';
import { createPinia } from 'pinia';
import './style.css';
import App from './App.vue';

const pinia = createPinia();
const app = createApp(App);

app.use(pinia);
app.mount('#app');
Create a stores directory
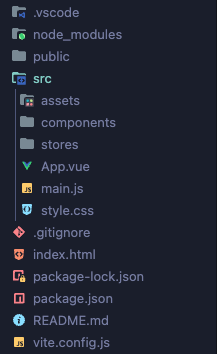
With Pinia injected into our application, it will be looking for data stores in a /stores directory within the /src directory. Go ahead and add that directory. Then our file tree should look like so:
Quick review of application functionality
Before we jump into defining our first store, let’s quickly review the functionality within the HelloWorld.vue component, which was added to our application during the Vite setup process.
In the script tag, this file is managing the count state locally within the component:
import { ref } from 'vue';

defineProps({
	msg: String,
});

const count = ref(0);
The count state is then being modified within the template via an @click event listener applied to a button element:
<button type="button" @click="count++">count is {{ count }}</button>Simple enough! If you test this functionality in the browser, you’ll see the count number increase every time the button is clicked.
Create a store
Now let’s define our first store. We’ll essentially move the count state and related actions to the store, then import the store in HelloWorld.vue.
Add a file to the /stores directory called counter.js. Open that file in your editor.
The first two key concepts for using Pinia are using the defineStore method provided by Pinia, and naming our store. We want to import that method, pass a string to that method that will be the name of our store, and export that defined store using a use[StoreName]Store convention. For example:
import { defineStore } from 'pinia';

export const useCounterStore = defineStore('counter', {
	// Store configuration will come here
});
Here, note how we’re naming the store counter, and then exporting the defined store as useCounterStore. This is the convention recommended by Pinia and yes, you should absolutely use this convention.
Configuring the counter store
Your store can be defined using either the Options API style to create an Option Store, or the Composition API style to create a Setup Store. The documentation tells us that use of either is fine, and while setup stores is the direction Pinia is heading, using an option store is the simplest place to start.
At this point in time, I personally develop Vue projects using the Composition API in my components, and Option Stores in Pinia.
This is simply my current personal preference! I believe I’ll eventually migrate to Setup Stores to take advantage of the better code organization provided with Vue’s Composition API, however I enjoy Option Stores for now.
Defining the initial state
Let’s jump into the configuration of the object that’s passed to defineStore.
We’ll start with defining the state, which will be a property with a value of a callback function that returns an object. We’ll initialize the count at 0. Think of state as the data of the store.
import { defineStore } from 'pinia';

export const useCounterStore = defineStore('counter', {
	state: () => ({
		count: 0,
	}),
});
Define a getter
If state is the data of the store, getters can be considered the computed properties.
Only use a getter to provide a modified version of something from state!
An early misconception I had when first learning Vue was that getters are how you access state around your application. In reality, and particularly in Vue 3 with Pinia, you can access state directly (we’ll learn how). A getter would provide the return value of a piece of state passed to a function.
Getters are defined as methods provided on a getters object. We also need to pass our state as an argument to each method so we have access to it within the function. For example:
import { defineStore } from 'pinia';

export const useCounterStore = defineStore('counter', {
	state: () => ({
		count: 0,
	}),
	getters: {
		doubleCount: (state) => state.count * 2,
	},
});
Again, notice how we’re returning a modified form of our state from doubleCount. We do not, for example, want to define a getter like getCount to return state.count.
Define an action
The store actions will be functions called from around our app, or by other actions in the store. Typically, an action would modify our state somehow; however, it’s plausible to use an action without modifying state, such as fetching data from an API and returning that data from the function. In most cases, an action will have some impact on state.
Rather than defining actions as methods, we need to write an actions object with functions. These functions will automatically have access to this, which is our whole store instance. For this reason, we can’t use arrow functions for our actions. And again, no need for mutations! Pinia removes some of the bloat inherent in Vuex.
We’ll add an increment function:
import { defineStore } from 'pinia';

export const useCounterStore = defineStore('counter', {
	state: () => ({
		count: 0,
	}),
	getters: {
		doubleCount: (state) => state.count * 2,
	},
	actions: {
		increment() {
			this.count++;
		},
	},
});
And there we have it, our first Pinia store! Next, let’s head back to our component for consumption.
Consuming a Pinia store in a Vue component
Now that we’ve defined our store, let’s consume it in our HelloWorld.vue component, and access its state, getters, and actions.
To access our store, we first need to import it. As a reminder, our Vite project was scaffolded with the Composition API — more specifically, it uses Vue’s syntactic sugar script setup in our script tag, so we don’t need a setup() function.
We’ll import the store from the module we defined it in, and we’ll also initialize it by calling the store:
<script setup>
	import { ref } from 'vue';
	import { useCounterStore } from '../stores/counter';
	const counterStore = useCounterStore();

	defineProps({
		msg: String,
	});

	const count = ref(0);
</script>
Now with counterStore available to us in the setup, we’ll use it. First, we’ll remove the existing ref for count, as we no longer need it. We’ll then replace any instance of count with counterStore.count. We’ll also swap the instance of count++ on the click event listener to use counterStore.increment(), which will modify our global state.
Let’s update our button element like so:
<button type="button" @click="counterStore.increment()">count is {{ counterStore.count }}</button>And voila! Our application in the browser will function exactly the same as before, but the store will available globally to any component that is configured to consume it.
Let’s not forget about our doubleCount getter, which we can add to render beneath the button element:
<button type="button" @click="counterStore.increment()">count is {{ counterStore.count }}</button>

<p>count times 2 is {{ counterStore.doubleCount }}</p>
In the browser, clicking the count button seven times will result in the following:

Don’t destructure from the store!
One final word of warning we should leave here with is to not destructure your state, getters, and actions from the data store module. They will lose their reactivity if you do. If you’d like your code to be slightly less verbose, you can use Pinia’s storeToRefs function. Check out the Pinia documentation on using a store for more.
Similarly, it’s worth highlighting that if you want to save a getter from the store to a variable in your component, you need to wrap the getter in a computed function.
For example, let’s say we wanted to save counterStore.doubleCount to a variable doubleCount for the sake of being less verbose. Your intuition might be to use a ref like so:
<script setup>
	import { ref } from 'vue';
	import { useCounterStore } from '../stores/counter';
	const counterStore = useCounterStore();
	const doubleCount = ref(counterStore.doubleCount);
</script>
However, doubleCount will no longer be reactive. It will render with the initial value returned from the getter and not update dynamically as we click the button. Instead, use a computed property:
<script setup>
	import { computed } from 'vue';
	import { useCounterStore } from '../stores/counter';
	const counterStore = useCounterStore();
	const doubleCount = computed(() => counterStore.doubleCount);
</script>
Your HTML could then be slightly less verbose:
<p>count times 2 is {{ doubleCount }}</p>When to use Pinia
Keep in mind that you should not by default install and utilize a state management solution, regardless of the specifics of your application. If you’re building a simple calculator app, for example, you most likely do not need global state.
If your project only has a handful of components, it’s very possible that a simpler, more lightweight solution to maintaining state is through props and event emission.
I mentioned earlier that if you’re passing props to one component just to be passed to another, meaning you have a component accepting props that aren’t utilized at all within that component, you likely need to be using Pinia. While this is generally true, if your application only has 3 or 4 components, prop drilling may be fine.
Key references
- Pinia documentation — there’s a lot more to Pinia than what we covered today!
- Vue.js documentation
- Vue Mastery